Autostart OpenVPN Tunnel on Windows
This tutorial explains how to create a new windows service to connect to a given OpenVPN server on system start. The setup was tested on a Windows 7 and Windows 10 machine. To successfully finish this tutorial, a working OpenVPN configuration file is a precondition.
Preparation
First of all you need to install the OpenVPN client for the operating system Windows. At the time of writing, the corresponding executable could be downloaded from the following website: https://openvpn.net/community-downloads/.
After you successfully installed the client, you should start OpenVPN-GUI by clicking on the Microsoft Icon in the lower left corner of your desktop. Then just enter openvpn.
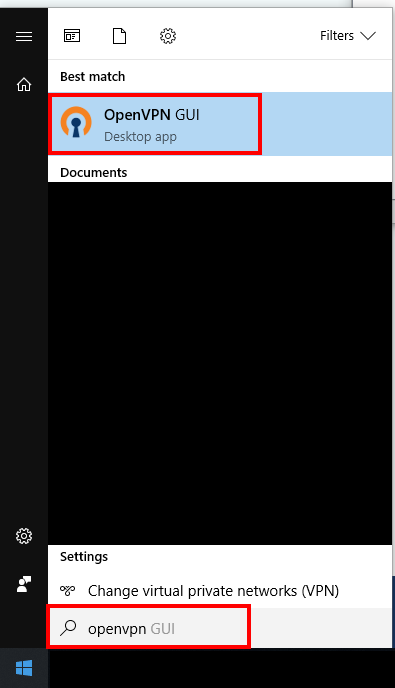
The recently installed VPN client should show up in the search results. Just click on it, which will start the client. You should see a icon like the following figure outlines in the lower right corner of your desktop.

Configure OpenVPN Client
Now perform a right click on the previously mentioned icon and choose Import file.... Select the OpenVPN configuration file, which should have the extension .ovpn. You should get this file from the guy or the company who operates the OpenVPN server. In the next step you should change the settings of the client. Therefore, perform a right click on the OpenVPN-GUI icon once again and choose Settings.... The following figure shows the correct settings. The options which should be changed are highlighted.

The modifications of the settings ensure, that no windows will show up if a VPN connection is established via the OpenVPN Client. Normally a window shows the executed steps of the connection process and a notification shows up if the VPN connection was established successfully. Via the setting Silent connection you can configure, if a notification should show up when the VPN connection was established successfully. The option Show Balloon defines if the log information of the connection process should be printed. If you want to see one of these mentioned pop ups, ensure that you choose the appropriate option to fit your needs.
Create Windows Task
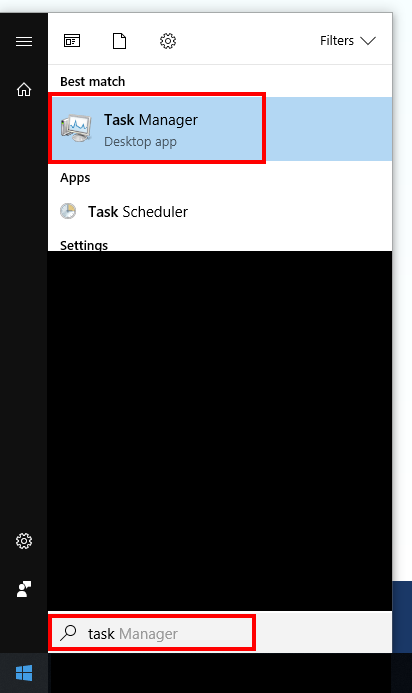
The next step is to configure a new Windows task. This task should automatically establish the VPN connection to the server, if the device gets connected to a network either via Ethernet or WLAN. To create a new task click on the Microsoft icon in the lower left corner and enter Task Manager. Click on the appropriate entry, which should open the corresponding application.
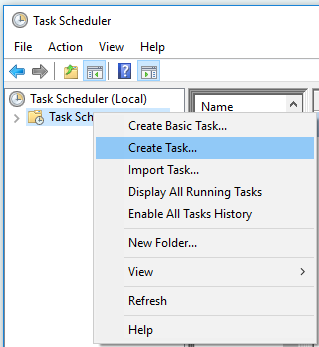
Perform a right click on Task Scheduler and select Create Task to create a new task.
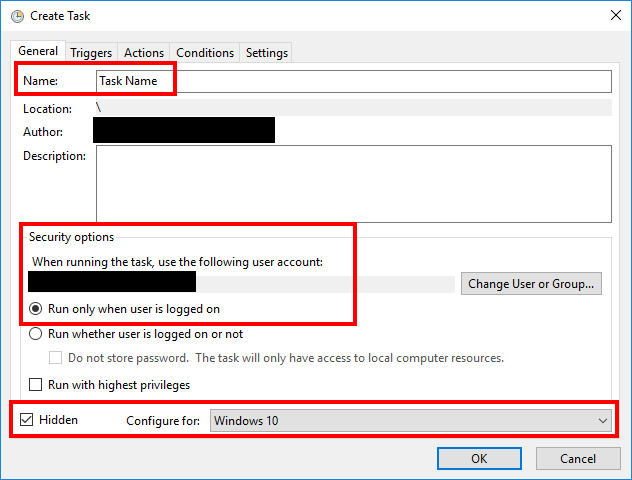
First of all you have to define the name of the task and if a notification should show up, when the task is started. Following figure provides an example how this page looks like.
On the next tab called Triggers configure a trigger, which defines when the task should be started. The new trigger should contain the following values.
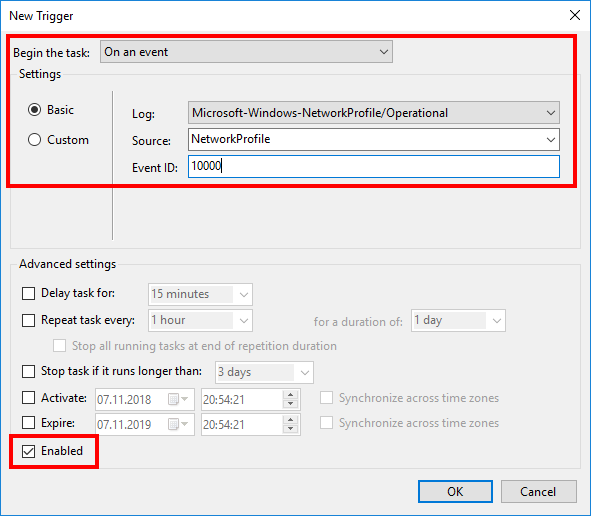
This specifies that the task should be started if a Windows event with the Event ID 10000 occurs. This event indicates that the device got connected to a network. If every field was filled out and every checkbox ticked click on the button OK. In certain cases the network connection will be established before the user performs the login and the task won't be triggered. To ensure that the task will be started after the user successfully logged in, create a second trigger with the following entries.
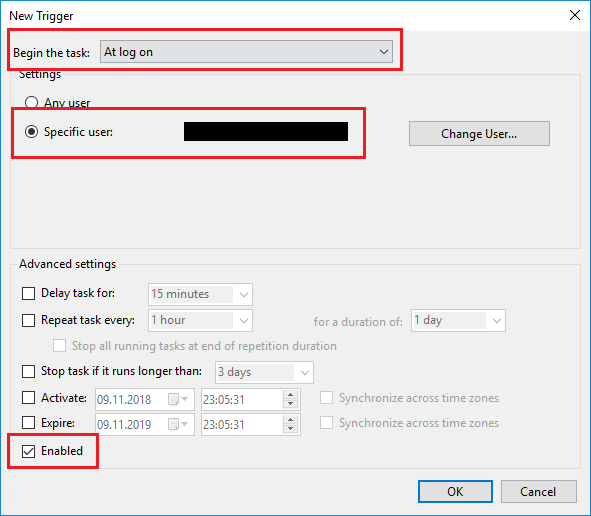
For the option Specific users your personal account should be selected, otherwise select the appropriate account.
Now the connection will be established if the user successfully logged in or if a network connection was established.
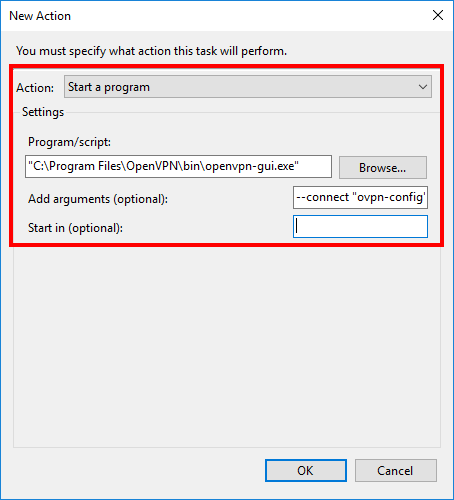
The next step is to define in the tab Action what action should be performed if the previous defined event occurs. In this case the openvpn-gui.exe should be started. In the arguments field, the parameter --connect and the name of the VPN configuration should be specified. The name of the configuration is equal to the file name, which was previously imported, but without the .ovpn suffix. To verify if the config file was saved in the appropriate folder, check the local path C:\Users\
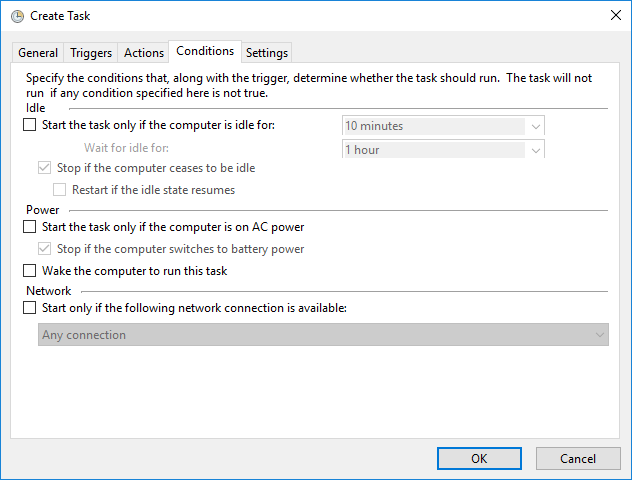
After everything was configured appropriate, click on the OK button. Via the tab Conditions it is possible to define if any condition must be fulfilled to run the task. To ensure that the task will start under every circumstance verify that no checkbox is ticked.
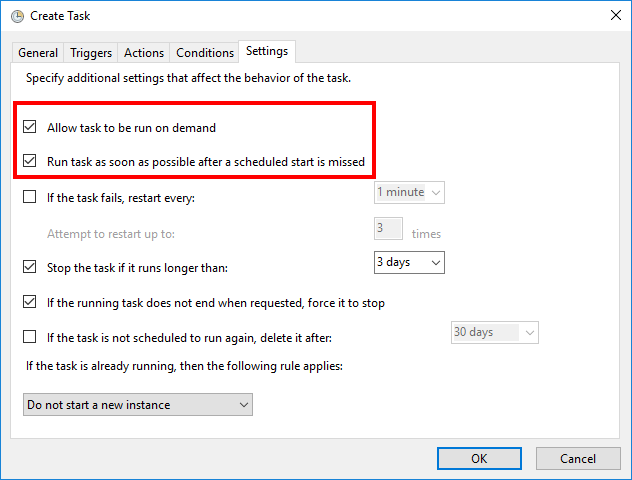
The last step is to configure the tab Settings. As the following figure shows, the checkbox Allow task to be run on demand should be ticked.
Now you can click on the button OK, which will close the configuration window. If you perform a reboot of your device, the VPN client should automatically connect to the VPN server, after the WLAN connection was established or an Ethernet cable was connected. To verify if the connection was established successfully perform a right click on the OpenVPN icon in the lower right corner of your desktop and click on Show Status.